Import and export projects in bulk from the UI
Users with the Administrator system role can export and import projects in bulk as .zip files from the UI. For instance, this option can help you migrate from Test IT Cloud to Test IT Enterprise. Imported and exported files cannot exceed 1 GB.
Imported/exported data
The following data is transferred while importing and exporting projects:
- Project and its description
- Test library and test versions
- Test plans
- Autotests
- Autotest runs within the last 30 days
- Webhooks
- Projects attributes, parameters, configurations, and error categories
- Project archive
The following data is skipped:
- Users
- System settings
- Integrations with bug trackers
- Archived projects
- Project queries and saved filters
- Sections attachments
- Dashboards
- Test case changes history
Export projects in bulk
You can export projects from Test IT as .zip files. All the projects you export at a time are saved as one .zip archive. The option is available under a valid license only.
To export projects:
- Open the Projects tab. It opens by default once you log in to your account.
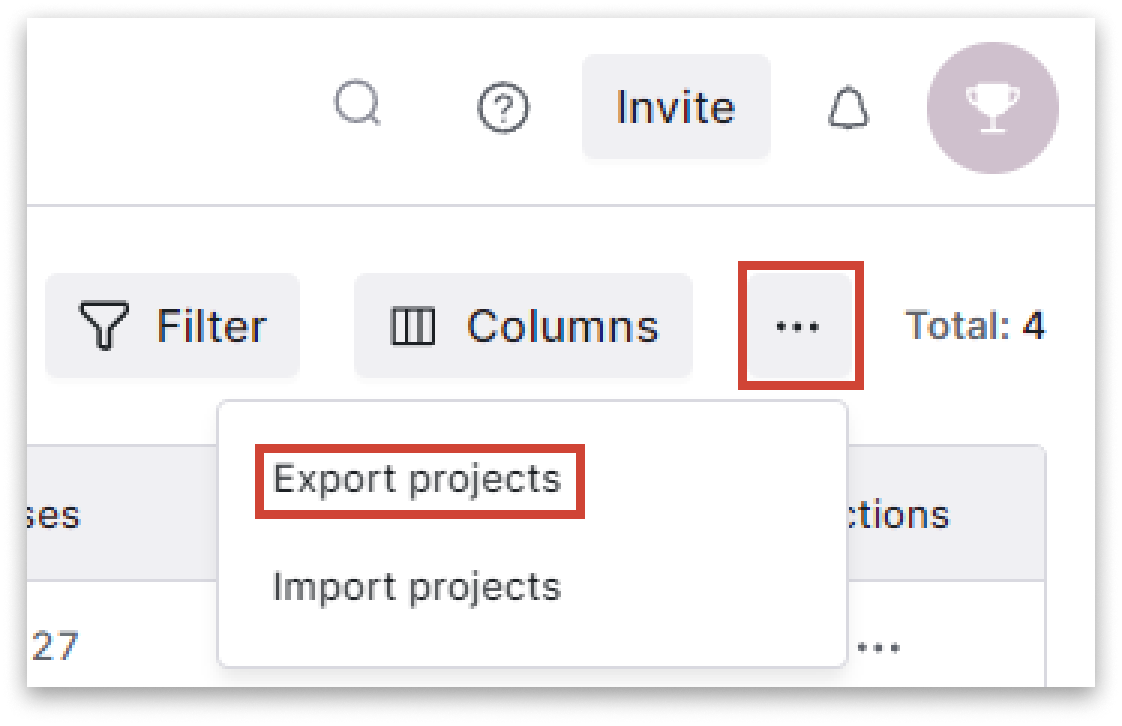
- In the upper right corner of the window, above the project list, click the Bulk actions icon. In the dropdown menu, select Export projects.

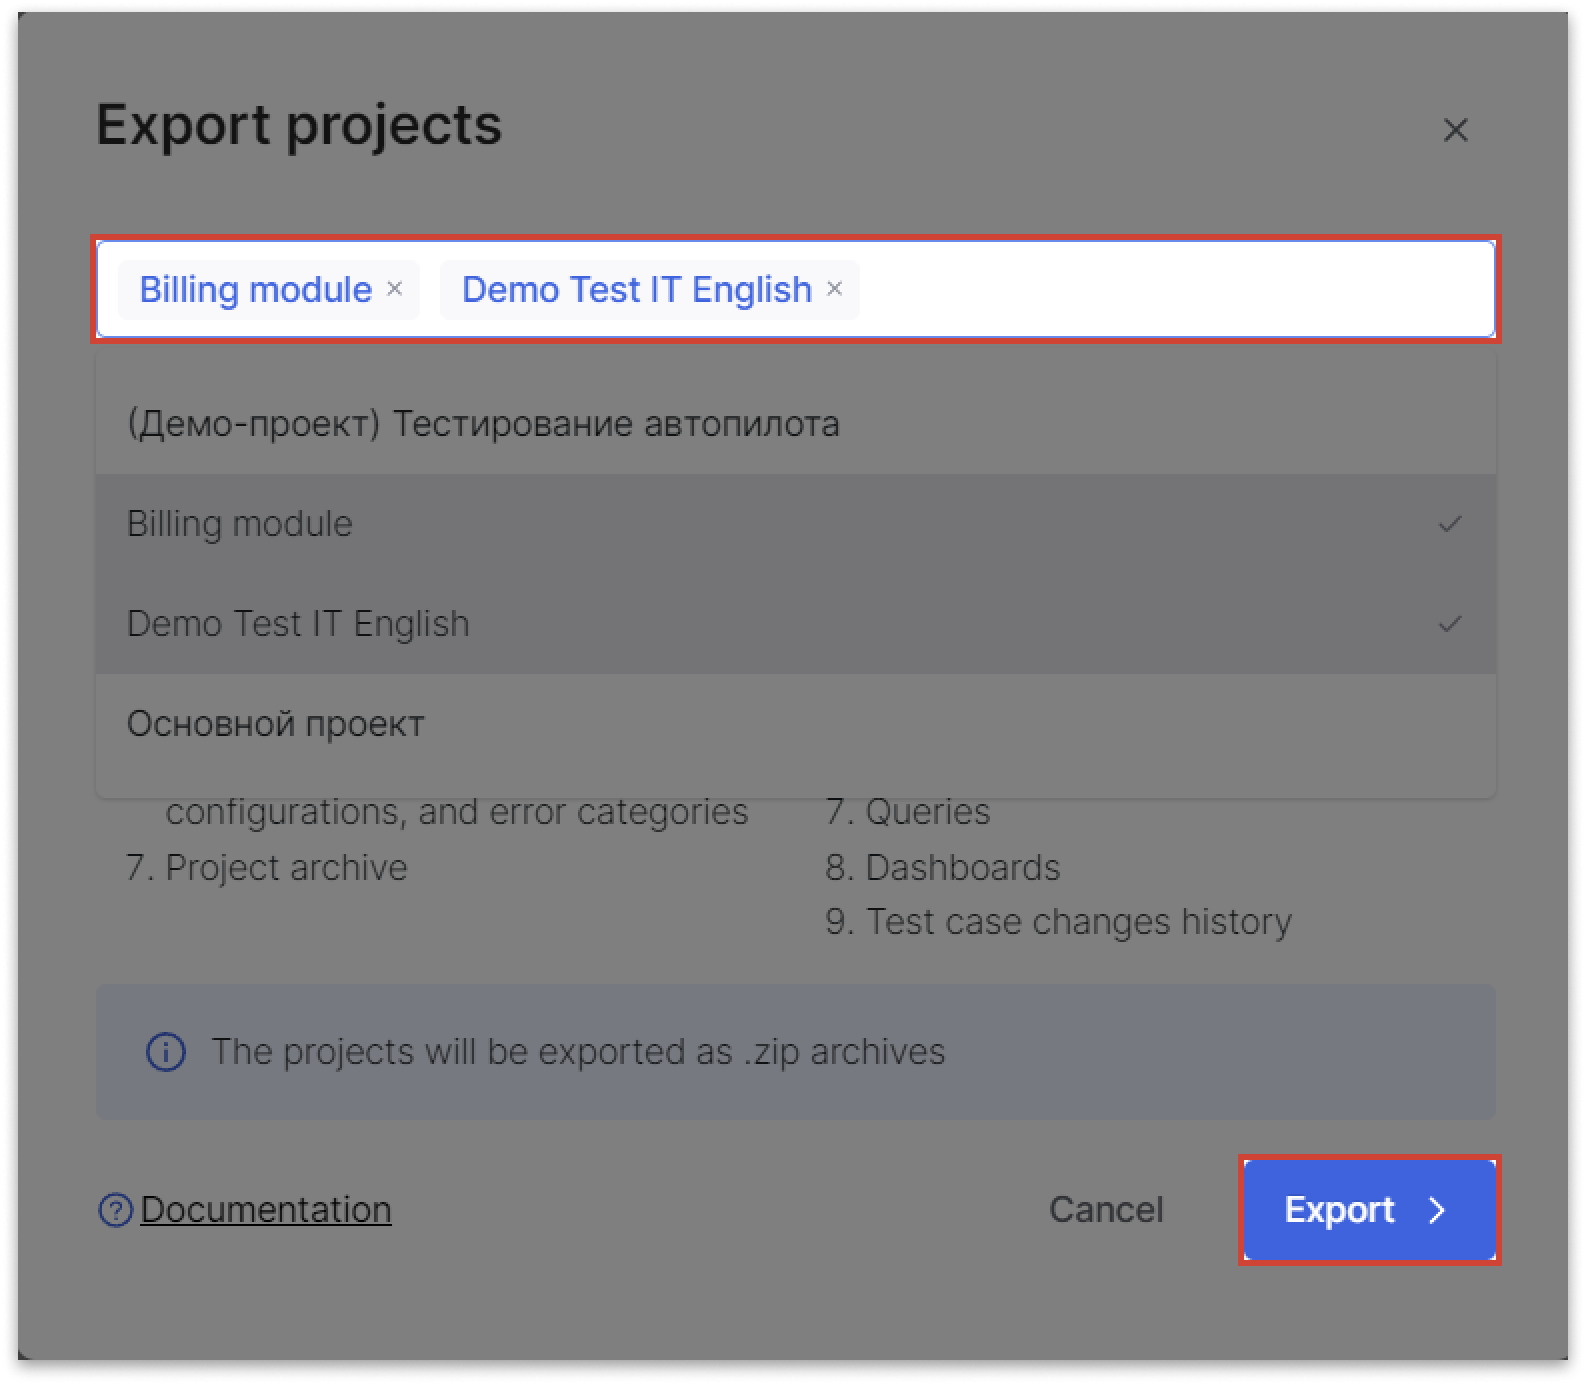
- In the Export projects window that opens, use the dropdown menu to select the projects to export.
- Click Export. You will see the message that the export process has started.

- Optional: Track the export process on the Background tasks page.
- Once the export is completed, download the
.zipfile on the Background tasks page.
Import projects in bulk
You can import multiple projects as one .zip archive. You can import only one archive at a time.
Warning!
Once you re-import projects, they are not replaced. Instead, the new identical projects will be created in the system.
To import projects:
- Open the Projects tab. It opens by default once you log in to your account.
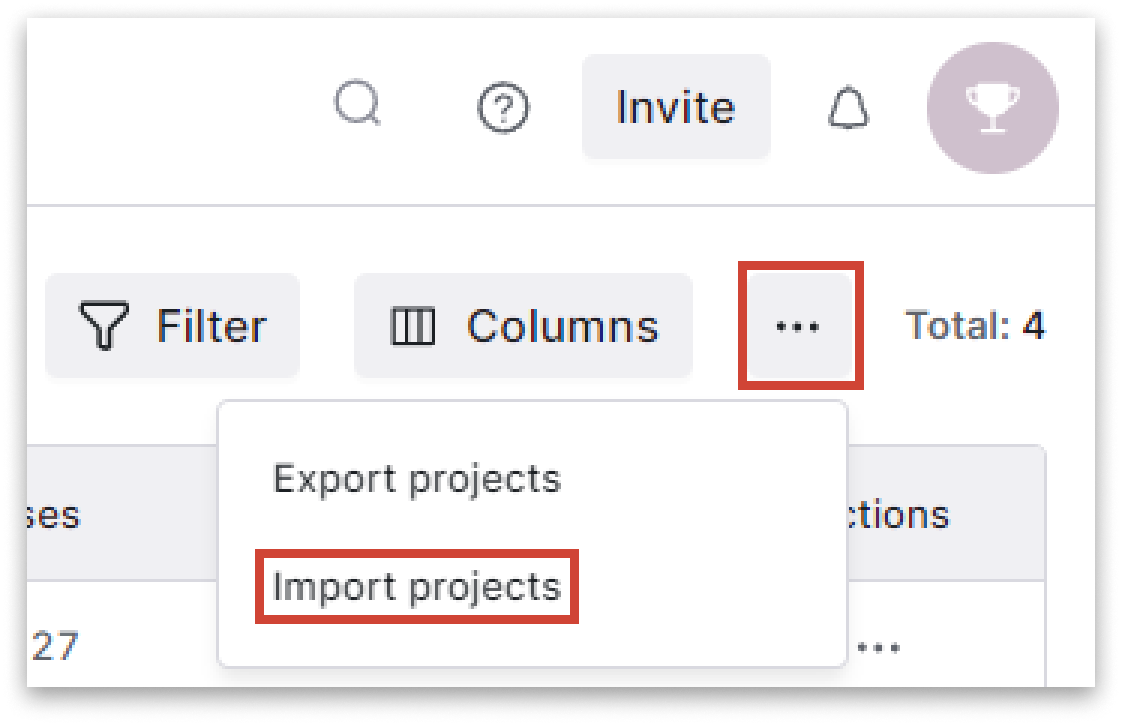
- In the upper right corner of the window, above the project list, click the Bulk actions icon. In the dropdown menu, select Import projects.

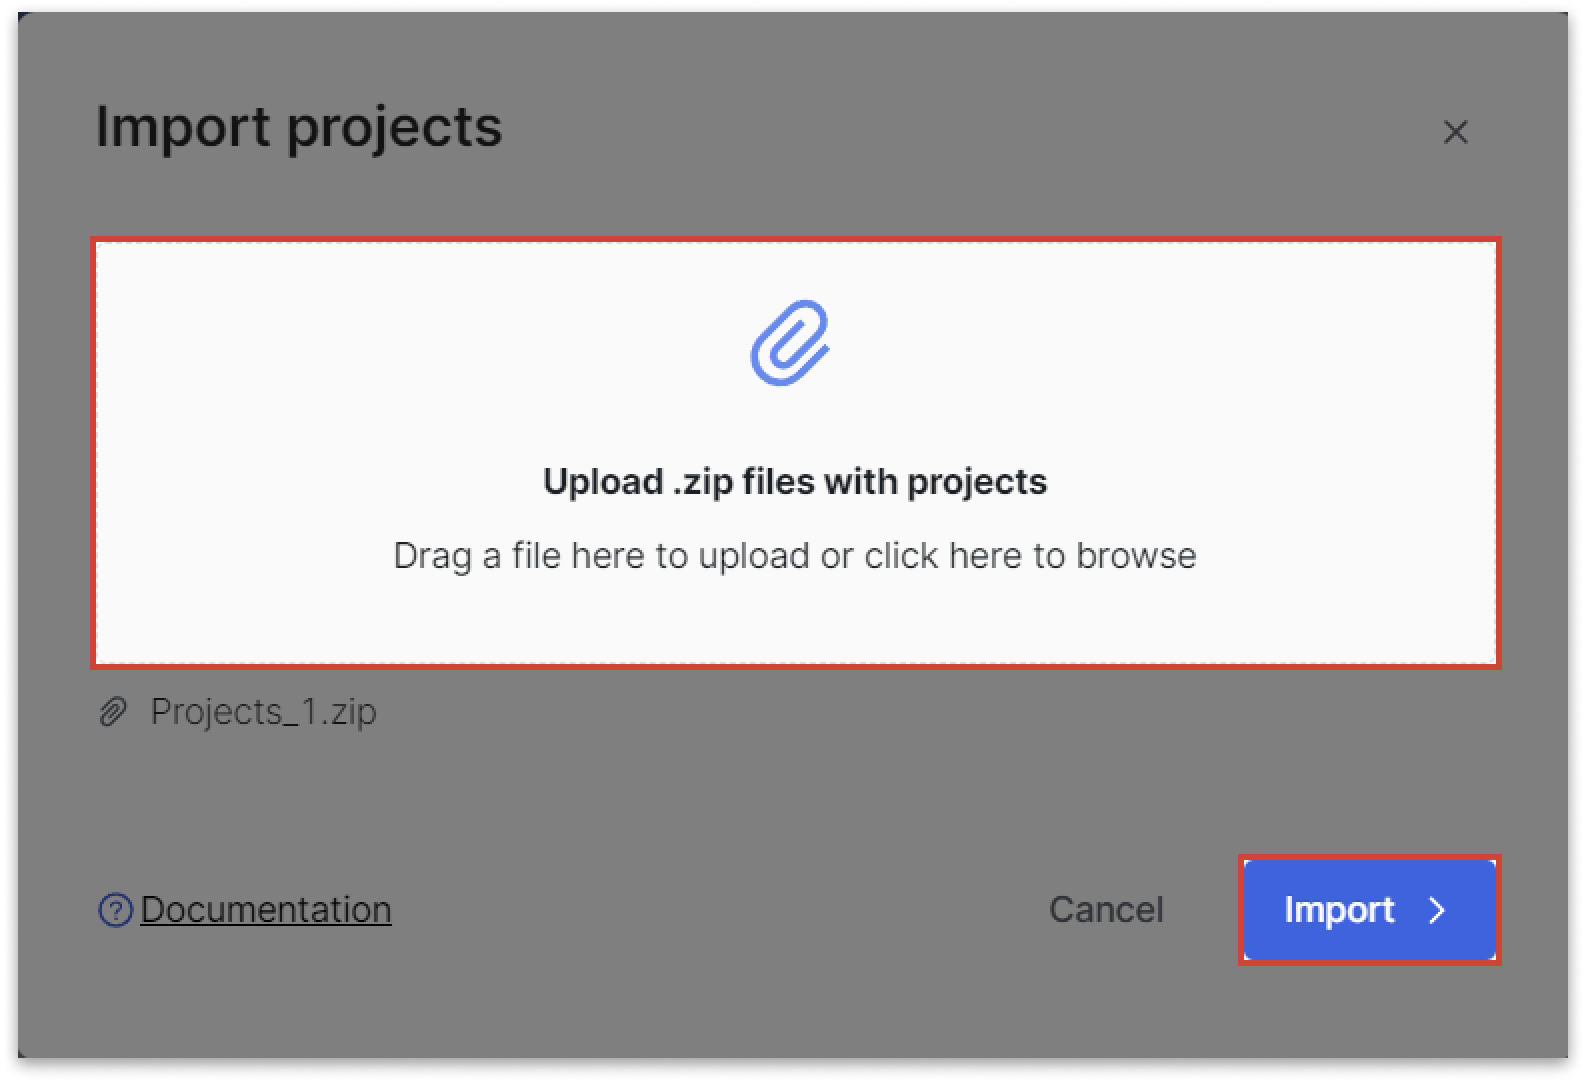
- In the Import projects window that opens, upload your projects as a
.ziparchive. You can drag and drop or browse the archive. - Optional: To replace your archive before the import has started, upload a new archive. The old archive will be deleted automatically.
- Click Import.You will see the message that the import process has started.

- Close the Import projects window or wait until the process is completed. Once the process is completed, the projects will be available in the Projects tab.